
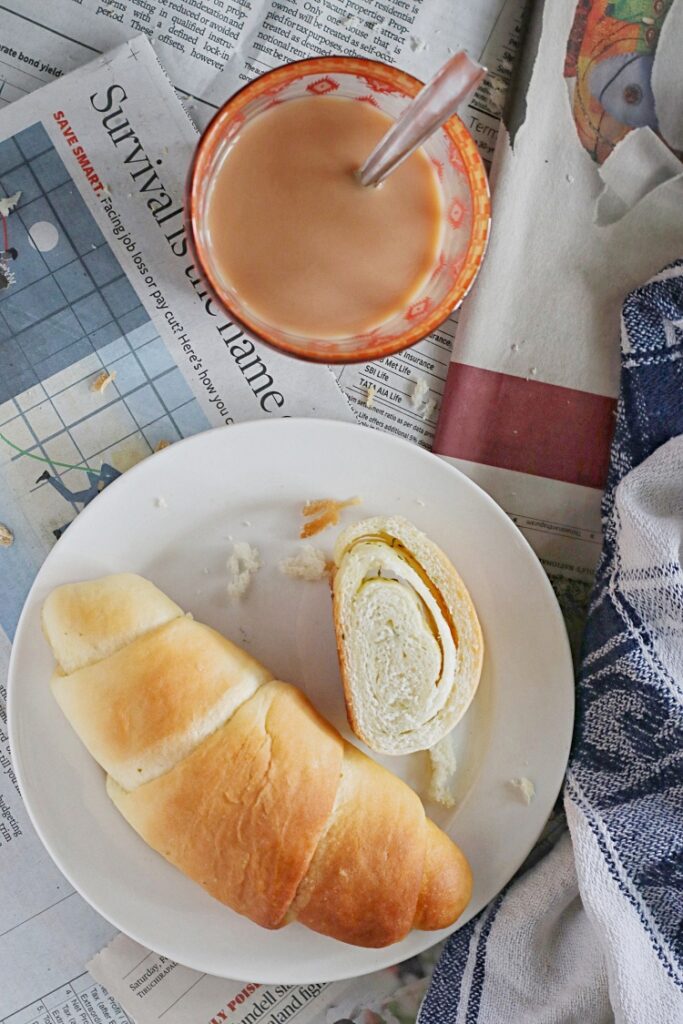
For November, Karen picked Shio Pan, or Japanese Salt Bread for the Bread Baking Babes to make. She first came across Shio Pan served with whipped cream cheese at a Japanese bakery in Anaheim. Shio is salt in Japanese and Pan means bread. Hence the Shio Pan, but this bread is so much more than just a slated bread. Shio Pan is a very soft and buttery flaked salt topped Japanese crescent roll that’s very crisp on the bottom.

This bread is said to have been first in late 2014 made by Pain Maison, a bakery in the Ehime Prefecture, Japan. It has been described as a marriage between the classic Japanese soft butter roll and French crusty bread roll. When the shaped dough is baked, the butter melts and creates a crisp bottom to the roll. You might think the rolls would get greasy but there’s no butter to be seen anywhere. All you get is the delightful flavour of butter in every bite. Of course, it goes without saying that the best butter makes the best Shio Pan.

These rolls are traditionally topped with flaked sea salt, hence the name Japanese Salt Bread. However you can find Shio Pan variations including an Everything version, a pesto and sundried tomato version, filled with red bean paste,egg-mayo and with a cookie crust topping like Pineapple Buns. The rolls can be filled after slitting them sideways. These buttery crescent rolls are also very popular in Taiwan.
Karen’s recipe below makes 6 rolls and was adapted from Vanillyn Bakery, Food 52 and others. These rolls are best eaten fresh, just a bit after they come out of the oven. They will be soft with buttery crisp bottom to the rolls. Leftovers freeze very well stored in zip lock bags. So you can make a double batch. Serve warm after reheating frozen butter rolls and they’re almost as good as freshly baked.

I made mine somewhat more-ish by brushing the dough with garlic flavoured melted butter with chopped fresh coriander/ cilantro. Otherwise I kept to the recipe. This Shio Pan is a keeper!
Shio Pan
Buttery and very soft Japanese salted crescent rolls stuffed with strips of butter and are crisp on the bottom.
Ingredients
- 1 3/4 cups bread flour
- 1 1/2 tsp granulated sugar
- 3/4 tsp salt
- 1/2 tsp instant yeast
- 2/3 cup milk
- 2/3 cup water
- 10 gm soft unsalted butter
- 15 gm butter melted, for brushing
- 60 grams butter cut lengthwise into 6 x 10 gm strips
- Flaked sea salt for topping
Instructions
-
You can knead using a machine as well. Whisk together the dry ingredients in a medium bowl. Add the milk and water and mix by hand or dough whisk until just combined. Add the soft butter and knead it in by hand.
-
Knead the dough by hand (using pressing, stretching, and folding constantly) or mixer for about five minutes, until smooth and elastic. The dough will be a bit sticky but don’t add more flour unless you fell the dough really needs it.
-
Let the dough rise until doubled in volume. This can take from 45 minutes to 2 hours, depending on your room temp.
-
Turn the dough out onto your unfloured work surface and form it into a 1/2 inch thick round disk. Cut the dough into 6 wedges with a bench scraper. Roll each piece of dough into a cone, from long side to long side, pinching the seam. Let the dough cones, covered, for 10 minutes.
-
With your hands, press each into a triangle. Then, using a rolling pin, shape each into a very long, thin triangle, like for croissants. If brushing with melted fresh coriander-garlic butter, do it now. Then place a 10 gram butter stick on the wide end and roll up the dough and form it into a crescent. Place it on a parchment lined baking sheet.
-
Repeat with the rest of the dough. Cover loosely and allow to rise until puffy, about 45 minutes to an hour, in a warm spot.
-
Heat your oven to 200C (400F). When ready to bake, spray the shaped rolls with water until they are shiny. Sprinkle each with a pinch or so of flaked sea salt. Bake for 15 to 18 minutes, until lightly golden on top and crispy and browned on the bottom.
-
Transfer to a wire rack. Serve warm from the oven or within two hours. You can rewarm leftovers the same day to refresh them. Wrap and freeze additional leftovers for reheating in the oven the next day.
The Bread Baking Babes are –
Bread Baking Babe Bibliothécaire – Katie
Blog from OUR kitchen – Elizabeth